Weather photography is undoubtedly one of the most challenging yet rewarding types of photography. If you enjoy capturing unusual sights that you don’t ordinarily see, let alone in photographs, then weather photography might be a great option for you.
In this article, we’ll help you capture stunning photos of gloomy skies, thunderstorms, and even blizzards. Beyond simply taking the “right” shots, we’ll also focus on how to prepare properly and stay safe while taking your weather photography to the next level.
1.Do research in advance
As part of your preparation for weather photography, please conduct some important research beforehand. Weather photography carries significant risks and could prevent you from ever capturing any great shots. At the same time, you must ensure that your trip is purposeful and that you don’t waste any effort.
2.Check the weather forecast
Based on the target you’re tracking, such as fast-moving rain clouds or thunderstorms, plan the expected time and location for your shoot. Radar applications are also very helpful for many storm chasers, so you might want to download some weather apps.
In addition, you should check the national meteorological department’s safety measures and other relevant information to ensure safe outdoor filming.
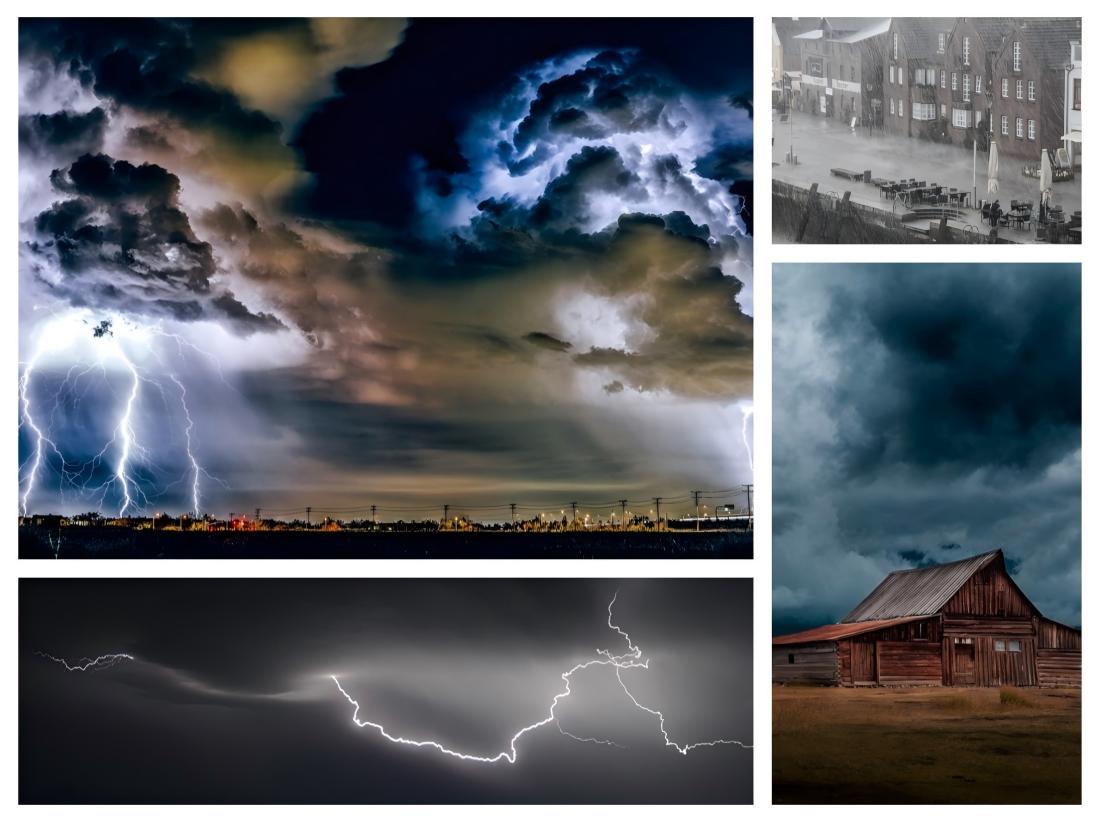
Weather photography requires doing weather research before going out
3.Understand the filming location
If a storm is approaching, be sure to familiarize yourself with the surrounding area to determine a safe location for your camera and how to drive in and out. If you are in an unfamiliar place, research as much information about it as possible and bring a map just in case.
If you’re unsure about signal coverage in your area, especially during storms, don’t rely on your cell phone. Using satellite GPS positioning would be better, but it can be very expensive for many people.
4.Bring appropriate equipment
When shooting in harsh and extreme weather conditions, you’ll definitely need some extra items in addition to the usual things you keep in your camera bag.
(1)Protective equipment
The essential equipment you’ll need first includes a camera and personal protective equipment. This equipment includes the following camera protective covers and lens caps, designed to protect you and your equipment from rain, dust, and dirt:
Waterproof camera bags, camera cases, lens caps/covers, microfiber cleaning cloths, raincoats, etc.
(2)Shooting equipment
Regarding photography equipment, we strongly recommend you bring the following items to ensure you can capture great photos even in unfavorable shooting conditions.
A.Professional camera – equipped with manual camera settings;
B.Sturdy tripod and counterweight bag – ensures the camera remains safe and stable even in moderate wind conditions;
C.Multiple lenses – allowing you to shoot at different focal lengths;
D.Neutral density (ND) filters – these block more light, which is especially useful when shooting lightning with a slow shutter speed during the daytime;
E.Shutter release/wireless intervalometer – minimizes camera shake, facilitates shooting slow-shutter-speed images and multiple frames (for time-lapse photography and HDR), and supports remote shutter triggering;
F.Lightning sensor and trigger – automatically triggers the camera shutter when lightning is detected;
G.Window mount – allows you to mount your camera as close to the window as possible, enabling you to capture clear and sharp images both indoors and in a vehicle;
H.Spare batteries and memory cards.
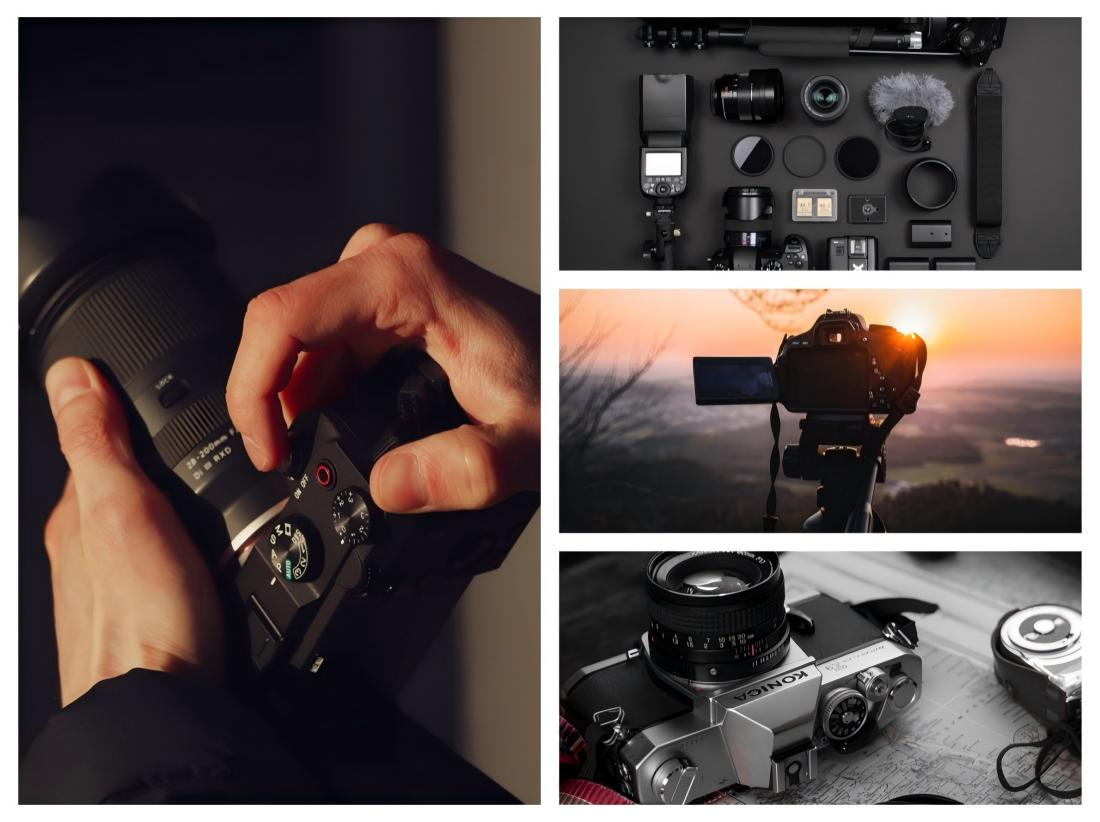
Weather photography requires bringing the right equipment
5.Set the ideal camera settings
The key to finding the right camera settings for various shooting situations lies in understanding how to configure manual camera settings. Once you understand what these settings do and how they interact with each other (and how they affect your images), you can start from scratch and experiment until you find the perfect settings for your DSLR or mirrorless camera. Alternatively, you can use the recommended settings below and adjust them to suit your specific shooting conditions:
(1)Focus
The focus of a storm is usually the distant clouds and lightning, so you can set the focus to infinity and then move it slightly back, or you can autofocus on distant lights or the moon. Remember, you can take a well-exposed photo, but if the stormy sky is out of focus, you might miss the main point of the shot.
(2)Aperture
The camera’s aperture (or lens opening) is another important setting for ensuring sharp focus throughout the scene. A general rule of thumb is to keep it around f/7.1 to f/11; this will produce a sufficient depth of field to keep both the background and middle ground in focus.
(3)Shutter speed
Shutter speed also helps keep the main image elements sharp, but there’s no ideal setting, as it depends on your aperture and the speed of the storm clouds—unless you’re shooting lightning, in which case a shutter speed of 5 to 10 seconds will give you a better chance of capturing the lightning. When the sky darkens, you can choose to switch to bulb mode.
(4)ISO level
Generally, to prevent noise or grain from degrading the image, you should keep the ISO as low as possible (while considering other settings). Start with ISO 100 and gradually increase it, especially when you need to use a faster shutter speed to match.
Weather photography requires adjusting camera settings based on the specific conditions
6.Start shooting
Arrive at the shooting location in advance, set up your equipment, strike a pose, and aim at your target. During the shoot, use your artistic intuition and try capturing various shots suitable for the specific weather and subject.
(1)Composition
When a violent storm appears before you, you may not always have time for careful framing and composition, but those few seconds might be all you need to capture a winning photograph.
Avoid shooting the exact same scene repeatedly. Try zooming in and out, or even shifting the main storm clouds or lightning to an off-center position. Additionally, find an angle that provides a clear, unobstructed view of the storm. These seemingly simple adjustments can bring unexpected and surprising results to your composition.
(2)Stacked images
You can try a cool technique: take multiple images (of the exact same scene using the same exposure settings), and then use image stacking software like Photoshop to combine them to create a spectacular image with multiple lightning strikes or a more dramatic cloudy sky.
(3)Creating time-lapse photography
Similar to image stacking, time-lapse photography also uses multiple photos, which are then stitched together using an app or software – this time, to create a short video that quickly shows the passage of time. You’ll need over 350 photos to create a 12-second time-lapse video playing at 30 frames per second, but the stunning results are definitely worth the effort.

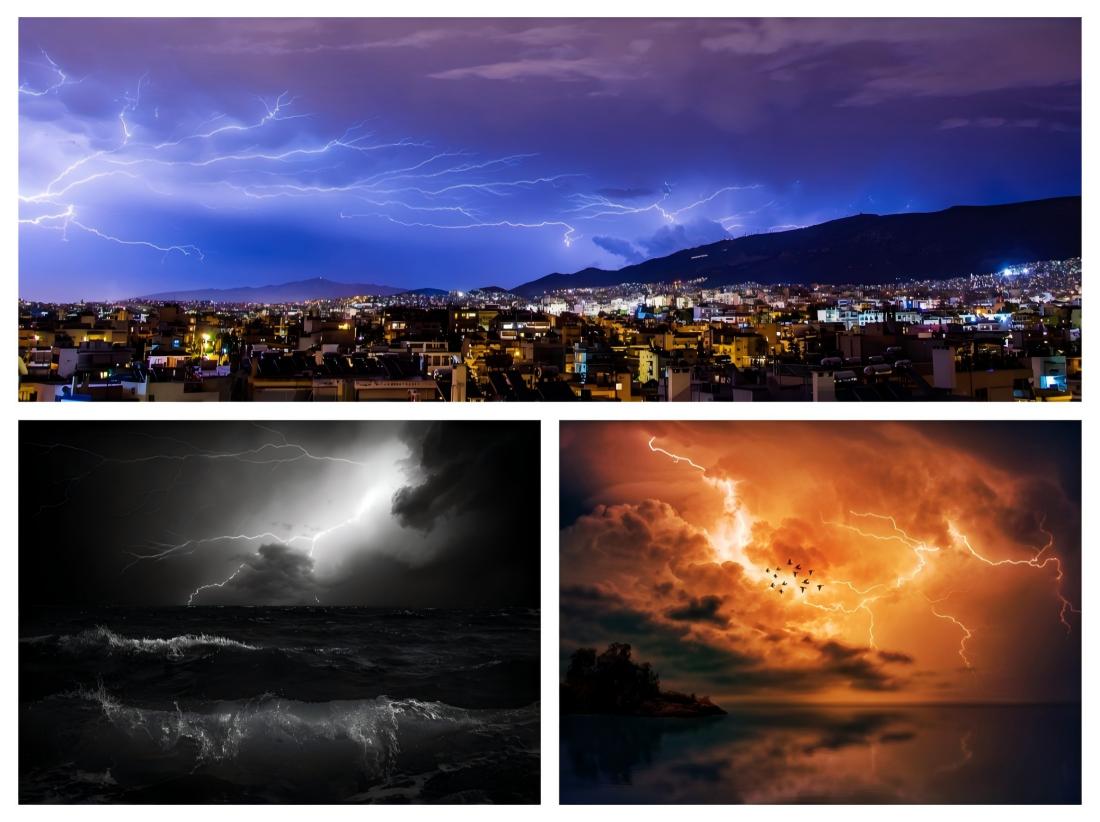
Weather photography can use some techniques
7.Stay safe
It’s best to photograph storms from a distance so you can capture their scale and the magnificent cloud formations in the sky. Therefore, there’s really no need to get too close and compromise your safety. If you can photograph from a shelter or car, or place your camera outside and use a wireless trigger, then do so.
Also, remember to dress warmly and bring extra layers of clothing in case the temperature drops during the shoot. Stay away from tall grass, bushes, and weeds as much as possible to avoid encountering any dangerous snakes or other animals that may be present in the area.
Post time: Mar-03-2026


